A Proofreader’s Checklist
April 29, 2022
Proofreading can be scary at times because it carries so much responsibility.
The proofreader must deliver a product that is as perfect as humanly possible.
In some businesses, the proofreader is the last person to touch a document, making the final changes before it is published.
Like editing, proofreading can require a light or a heavy hand, depending on the subject matter and the complexity of the text.
Some drafts require only minor fixes – typos, missing punctuation, misspellings – while others require extensive fact-checking in addition to correcting grammatical errors.
The Writers for Hire team has worked through a few kinks in its own processes, and shares the results here.
These tips, which focus on generally accepted best practices, are intended to ease most – but perhaps not all – of the anxiety sometimes surrounding the proofreading process.
1. Begin with a Discussion.
The proofreading process should begin with you, the proofreader, and the editor or client talking through how the project will proceed.
At the outset, you should agree on the preferred style guide and any deviations from or in-house exceptions to the preferred guide.

Most companies use a preferred style guide.
The Associated Press (AP) Style Guide, the Publication Manual of the American Psychological Association (APA), and the Chicago Manual of Style are the most common.
Despite the preferred style, some documents may require adherence to different guidelines, such as a client’s own style guide.
- Project-specific guidelines could include:
- Using European date format (day/month/year)
- Using 24-hour clock time (0930 versus 9:30 a.m.)
- Using only words or only symbols for monetary units
- Abbreviating or spelling out titles
- Keeping industry-specific usage, capitalization, or punctuation
- Using specific transliterations or spellings of foreign names and places
- Making exceptions to AP style, such as using the Oxford comma
But, of course, these are only a few of the various elements that you, the editor, and your client must agree on up front.
Otherwise, you could end up in a vicious cycle of editing each other’s changes back and forth.
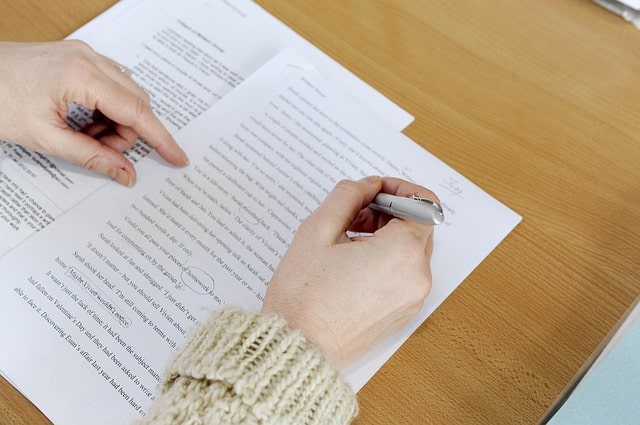
2. Print and Read Out Loud
Proofreading the hard copy of a text and pronouncing or mouthing each word can catch many more errors than reading it on a computer screen.
Reading each word out loud identifies missing and repeated words – a very common occurrence.

Checking for consistency in formatting is also easier when you page through a printed document.
- Other mistakes this best practice helps identify include:
- Incorrect subject verb agreement
- Incorrect antecedents
- Complex sentences that are confusing or too long
- Commonly misused homonyms and other words (their/there, its/it’s, and affect/effect, for example)
3. Check the Facts
Not all drafts require fact-checking, but for those that do, this is a critical step in proofreading. At a minimum, you should fact-check the following:
- Official country names and names of individuals, places, and organizations. Enter each into Google to confirm the correct spelling, capitalization, and punctuation.
- Ages, birth dates, and death dates. Check for errors such as someone turning different ages in the same year, or an event involving someone before they were born or after they died.
- Dates of events. Check all references to a specific day and date in a specific month and year to make sure they are accurate.
- Captions of photos and graphics. Make sure they match the text exactly, paying close attention to names, dates, places, and subject matter.
- Math in tables and graphics. Check what you can calculate using simple math, such as percentages and totals.
4. Look for Internal Inconsistences
Consistency in longer documents can be especially challenging because of the human tendency to read what should be on the page instead of what is there.
As you read, make a list of items to check for consistency against the agreed guidelines. Such a list might include:
- Formatting, grammar, and punctuation of bullets, headings, and subheadings
- Capitalization and use of titles
- Use of first names, last names, or both
- Capitalization of captions
- Chronological consistency
- Use of colons, semi colons, en dashes, and em dashes
- Formatting of dates and time
- Symbols or words for numbers and currencies
5. Use the Spell Check and Find Functions
The Spell Check and Find functions are very helpful, but a proofreader cannot rely on them to catch everything.
“ABC Spelling and Grammar” in Microsoft Word, for example, automatically identifies misspelled words, sentence fragments, and common grammatical errors, but it also can suggest changes that are wrong in the context of a document.
Spell-checking will, however, catch all unusual names and terms – because it doesn’t recognize them.
After you have confirmed that the spelling of a word is correct, click the “Ignore All” option.
If spell-checking catches another version of the word, then that word is spelled different ways in the document.
When proofreading on a PDF, use CNTRL A (to highlight all) and CNTRL V (to paste all) into a Word document.
Word will identify misspellings, but it also will catch words that aren’t misspelled because of the way it cuts and pastes in.
This is still better than no spell check at all, however!
Along with spell-checking, the Find function helps ensure consistency by checking for all instances of style choices in spelling, hyphenation, capitalization, and punctuation.
Searching for specific word and editing choices is easier using Microsoft Word’s “Advanced Find,” which has several options, including “Match case” and “Find whole words only.”
On a PC, click “Find,” then “Advanced Find,” and then “More” to see all the search options:

The “Navigation” pane in Find offers the choice of searching “Headings,” “Pages,” and “Results.”
Searching “Results” returns a list of results within their surrounding text; this option could be useful when checking for consistency in long, complex, documents.
On a Mac, be sure that your Standard Toolbar is open. Do that through “View” at the top, then scroll down to Toolbars > Standard:

The “Advanced Find” can be accessed from the top right “Search” box:

Click on “List Matches in Sidebar” to call up the “Find and Replace” window down the left-hand side of your document. Insert the word you’re looking for into the “Search Document” field:

Choose the gear icon to access a pull-down menu of advanced search options:

Once you’ve entered all your changes, spell-check the entire document a final time to uncover any glitches that escaped your attention.
Take Your Time
Proofreading takes time.
If your client only has a limited amount of time – or budget – to complete the proofreading phase, be sure to find out what the most important elements are, so you know how to focus your time.
And be sure to let the client know if the expectations aren’t reasonable. A rushed proofing job inevitably leads to further corrections
End with a Discussion
Once you are done proofing, be sure to review the changes you made with the editor or client, and discuss any remaining areas of concern that require your attention.
If the document contained tracked changes and comments, bracketed text, or highlights, make sure to remove them if you have addressed the issues.
If not, insert your own comments and raise them with the client or editor.