The Writers For Hire’s Top Microsoft Word Tips
July 25, 2022
We at The Writers For Hire have a bit of a love/hate relationship with Microsoft Word.
On one hand, it really is the best word processing software around. On the other hand, the formatting issues we sometimes run into are enough to drive even the most even-tempered of us mad.
Luckily, though, we have each learned some great tricks to make Word much easier to work with. And in this blog, we have joined forces to bring you our top Microsoft Word tips.
The Writers For Hire’s Top Microsoft Word Tips
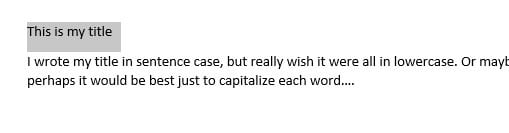
Tip #1: Change case.
If you’re ever in the process of writing a document and decide midway through that you would like all of your titles to be in upper case or sentence case, you know it can be time consuming to go through and individually change each letter. However, with this cool tip from Wintress Odom, changing case is as easy as a simple click:
1. Just highlight the section of text that you would like to change.
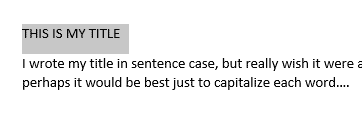
2. Now, go to the “Aa” on your tool bar and click on the arrow pointing down. This will give you a menu of case options.

3. Choose which case option you would like to use, and POOF! Your case will be changed.
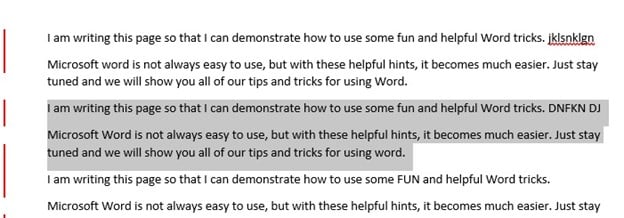
Tip #2: Accept (some) changes.
When using track changes, there are always some occasions where you want to accept some of the changes, but not all. Luckily, that’s easy to do with this next trick from Barbara Adams:
1. Highlight only the area you want to accept.
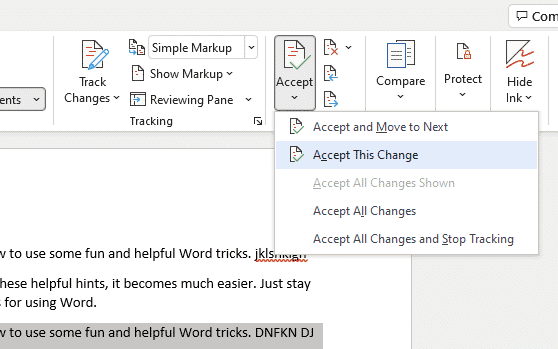
2. Now, go to the “Review” tab on your toolbar, and click on the “Accept” button.

3. A drop-down menu will appear. Choose “Accept This Change,” and only the areas you have highlighted will be accepted.
Tip #3: Create a custom toolbar.
For as many features as Word has, most of us tend to use a handful of the same ones 99% of the time.
Instead of constantly switching back and forth between tabs, you can save yourself some time by customizing your own personal toolbar. Here’s Kathy Rinchiuso’s trick for customizing:
1. Right-click anywhere on the toolbar, and a dropdown menu will appear.
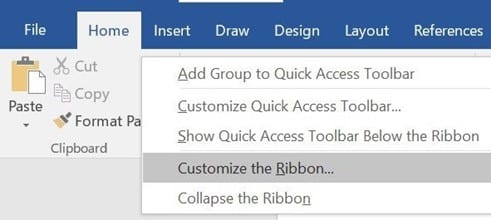
2. Choose “Customize the Ribbon.”
3. A menu will appear with all of the various options your heart may desire. You can go through and individually pick which features you would like for each tab of your toolbar.

4. Once you are done selecting your options, click “OK” and your toolbar will be updated.
Tip #4: Compare documents.
When multiple people are working on a document, it’s inevitable that someone will eventually forget to use “Track Changes.”
Luckily, with this great Word trick, you no longer have to comb through a document to look for changes. Instead, you can just use the “Compare” feature to see the revisions between two versions of a document.
Here’s how:
1. Make sure both versions of the document are open in Word.
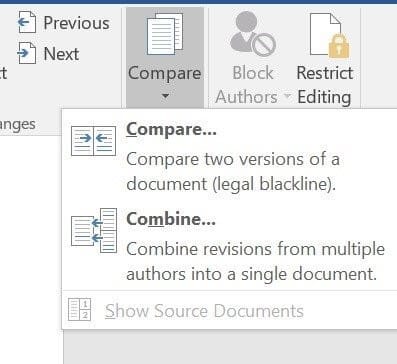
2. In the “Review” tab, click the “Compare” button.
3. Choose “Compare” in the dropdown menu.
4. Under “Original document,” choose the previous version. Under “Revised document,” choose the latest version.
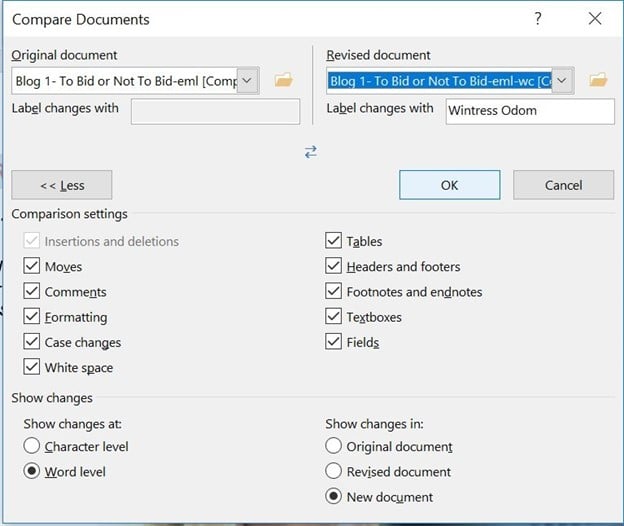
5. Click “OK.” Word will display a side-by-side comparison and a list of revisions.
Tip #5: Use “Tables” to insert images.
If you’ve ever tried inserting a bunch of images into a document by just clicking on “Pictures” in the “Insert” tab, then you’re likely familiar with what a nightmare image formatting in Word can be.
However, fixing this issue is as easy as simply inserting a table before you insert a photo. That way, when you insert your images, everything will fall (and stay) in place. Here’s how:
1. In the Word document, place your cursor where you want to insert an image.
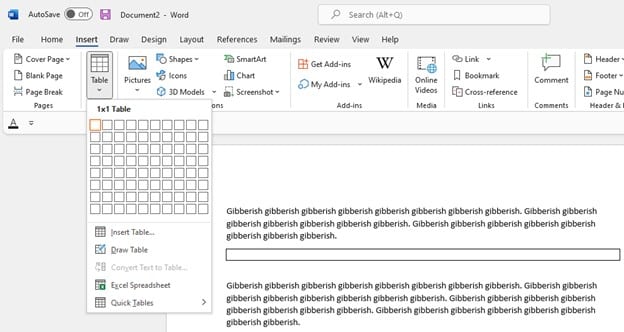
2. Click the “Insert” tab, then click on “Table.” The “Insert Table” menu will appear.
3. For a single image, select a “1×1 Table.” A table will be inserted into your document.
4. Click inside the inserted table to make your cursor appear.
5. Click on the “Insert” tab again, and then click “Pictures.”
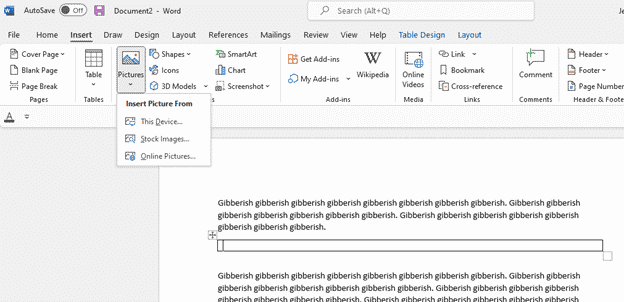
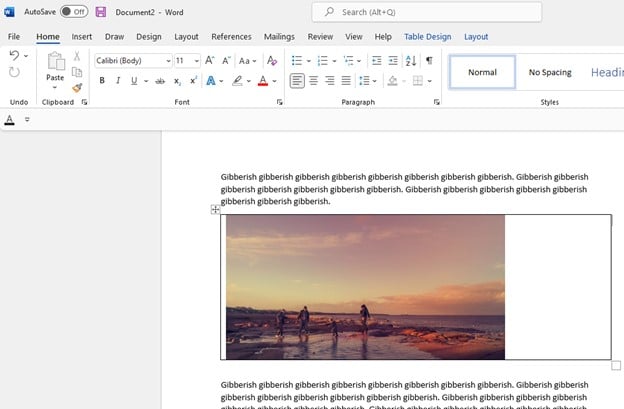
6. Choose the image you want and insert it into the table. Once your image is in the table, you can use the table borders to make the image bigger or smaller. Or you can move the entire table by clicking on the cross arow in the upper left corner.
Your image will visibly be inside a table at this point, but it’s easy to make those table lines disappear. Just follow these steps:
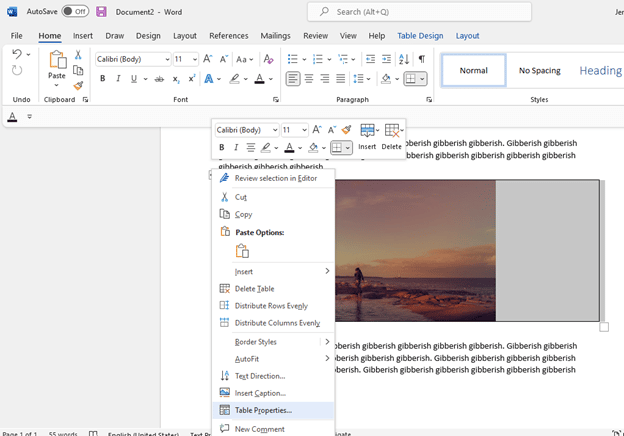
1. Right click on the arrow cross in the upper left corner.
2. In the menu that appears, choose “Table Properties.”
3. In the dialogue box that appears, choose the “Borders and Shading” button.
4. Another box will appear. Click “None.”
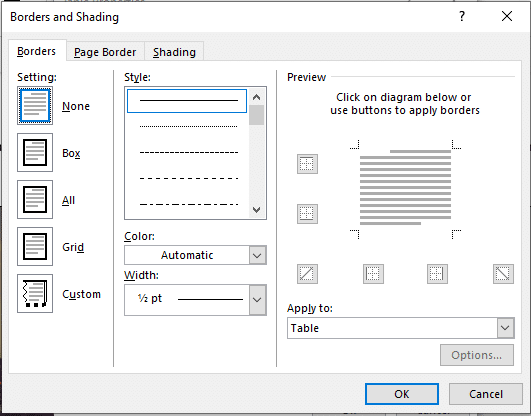
5. Once you click “OK,” the borders around your image will magically disappear!

Tip #7: Use “Format Painter.”
If you’ve ever copied content from one document and pasted it into another, you’ve probably had to go back to fix the formatting so that it matches.
There are a couple of ways to get everything uniform, but none of them are as good as Kathy Rinchiuso’s favorite tool, “Format Painter.”
This single button makes tedious formatting a breeze.
To use “Format Painter:”
1. Highlight some text containing the formatting that you want.
2. Click on “Format Painter” in the toolbar.
3. Now highlight the text that you want to change, and it will change to the desired formatting.

Tip #8: Use your “Ctrl” button.
If you haven’t mastered using shortcuts through your “Ctrl” button, now is the time to do it!
While this tip isn’t specific to Microsoft Word, it definitely makes typing in Word a lot faster.
Here are a few of our most-used “Ctrl” button functions:
- Ctrl+A to highlight all
- Ctrl+C to copy anything you’ve highlighted to the clipboard
- Ctrl+X to cut
- Ctrll+V to paste your copied content
- Ctrl+B to apply bold formatting
- Ctrl+I to apply italic formatting
- Ctrl+U to apply underline formatting
- Ctrl+Z to undo
- Ctrl+Y to redo
- Ctrl+T to increase a hanging indent
- Ctrl+Shift+T to reduce a hanging indent
- Ctrl+Enter to add a page break
- Ctrl+H to search and replace
- Ctrl+End to move to the end of the document
Tip #9: Add another language to spell check.
Are you tired of Word giving you a long errors list because you use languages other than English in your writing? Then this great feature shared by Jennifer Rizzo is just what you need!
Word’s “Languages” feature allows you to add languages to your spell checker so that they no longer come up as errors (and you can ensure you are spelling them correctly!).
To update the languages in Word:
1. Go to “Review” –> Language.
2. When the dialogue box opens, click on “Language,” and then “Language Preferences.”

3. Choose “Add a Language,” and use the drop-down menu to choose a language you want to add. Click “Install.”


4. Repeat as necessary to add more languages. Click “OK.”
Your computer will now be as multi-lingual as you are!
Tip #10: Use Notepad to fix formatting issues.
It is inevitable that, at some point, you will have problems with Word doing strange things to the format of your document. When this happens to you, this easy hack from Wintress Odom will save the day.
All you have to do is copy all of the content in your document (just use Ctrl+A, and then Ctrl+C) and then paste the entire thing into Notepad.
Then, copy it from Notepad and paste it back into your document. Just like magic, your formatting issues will have all disappeared!
We hope that these great Word hacks help make your life a little easier!
Be sure to check back in the future, as we will continue to add more tips as we discover them.