Managing Content Campaigns in Wrike
July 21, 2023
Many companies struggle with managing their content campaigns, especially if they have multiple projects going at once. The solution is to have a tool in place that allows you to multitask easily within a collaborative environment.
Wrike is an application that lets you manage several content campaigns simultaneously. With a single account, you can collaborate with team members, create calendars, track timesheets, and manage content files.
As with any content management tool, you’ll need to learn how to use it. Let’s give you a head start on that now.
What is Wrike?
Wrike is a project management tool and collaborative work platform that offers a wide variety of project management tools, including:
- To-do lists
- Timesheets
- Dashboards
- Detailed reports
- File management
Wrike has several features and benefits related to content campaigns. For example, you only need one application to access all your project management tools conveniently. This feature saves time in planning and organizing your projects.
In addition, all your team members are in one place, so there’s no need to slog through separate email contact folders. Wrike finds contacts automatically and notifies people through several notification channels, such as email and Microsoft Teams.
Wrike offers an agile, collaborative environment where you can manage access rights for associates, SMEs, and partners. You only need one workspace to navigate between projects, tasks, and folders. Share and manage tasks with whomever you want – there are no boundaries.
Finally, Wrike offers outstanding flexibility. Share tasks between departments while having one project folder. You can even overlap activities within one marketing campaign. All this is possible with Wrike’s unique filesharing system that allows anyone to work on anything at any time.
Managing Content Campaigns in Wrike
Planning is vital to the content creation process. Planning your web copy ensures that readers find the information they need. It also increases the chances that they’ll stay longer on your site.
Planning also reveals the purpose of each page. It helps you discover the content to prioritize and allows your site to flow from page to page.
Wrike provides the necessary tools to plan and organize your content from start to finish. Here, we show you how to:
- Create a content calendar
- Set up your dashboard
- Use content templates
- Perform mass actions and editing
1. Creating Your Content Calendar
A content calendar keeps your campaign tasks on track up to the deadline. It also shows the work already completed and gives timelines for specific tasks.
Follow these steps for creating your content calendar:
- From the “My Home” page, click “Calendar”
- Click “+New Calendar”
- A drop-down menu appears:
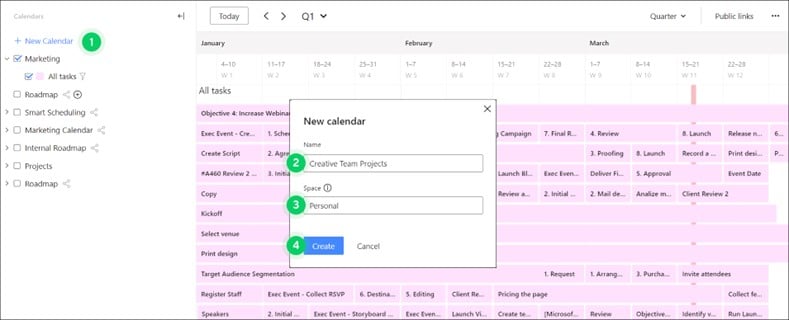
- Enter a name for the calendar
- Select a space for the calendar (“Personal” is the default.)
- Click “Create”
Creating a Layer
- Select the calendar you want to add a layer to and hover over its name
- Select “Create Layer”
- A popup menu will appear:
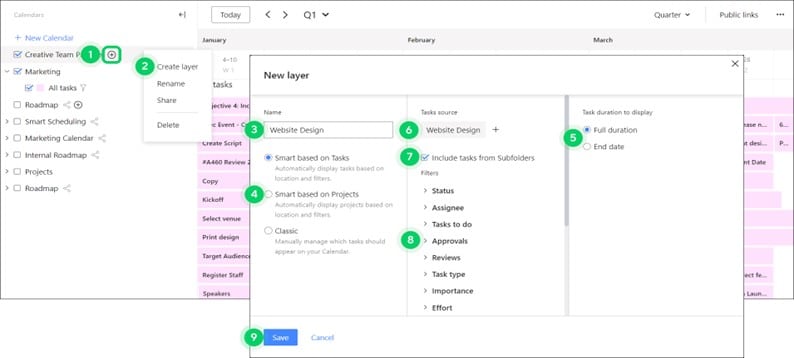
- Enter a name for the layer
- Choose a layer type
- Choose how to display tasks
- Select task duration
- Select the folder to work from
- Include optional subfolders
- Apply filters
- Click “Save”
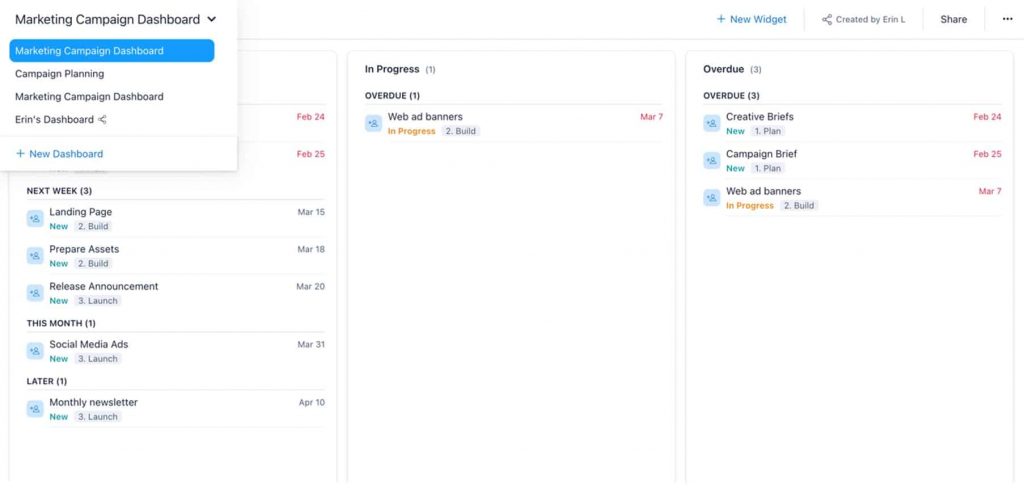
2. Setting Up Your Dashboard
Dashboards in Wrike are customized platforms that show your work progress through the entire content campaign. They provide real-time workflow data so you can stay current on all project activities. You can also maximize efficiency and productivity by generating real-time reports.
Creating Your Content Dashboard in Wrike:
- Click “Dashboards” on the Home Page menu
- Click “Create Dashboard” and select ”+ New Dashboard” from the bottom of the dropdown menu
- Enter a name for the dashboard and specify the workspace where it will reside
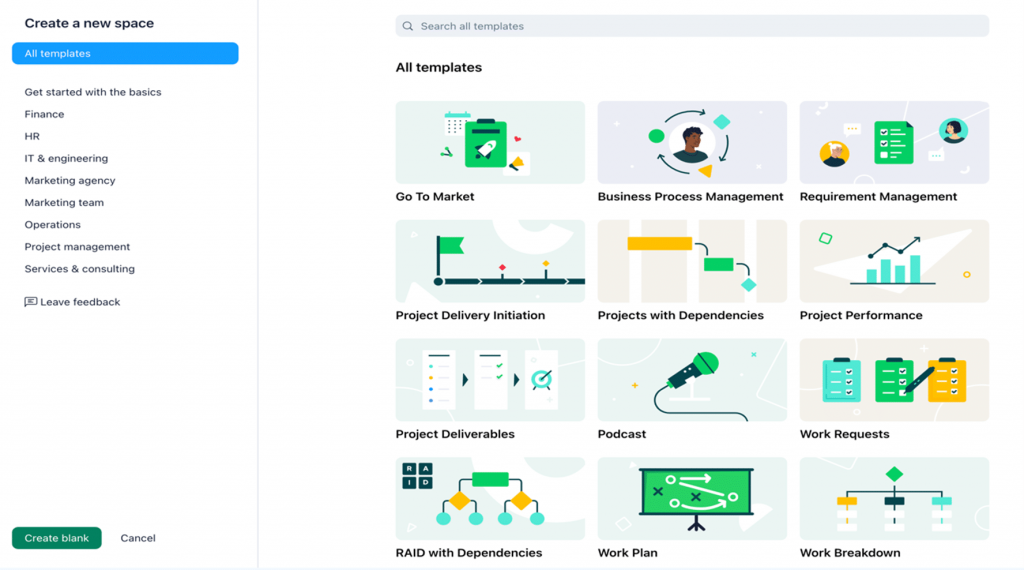
3. Using Templates
Use templates to move from one project to the next quickly and efficiently. This feature saves time by not having to set up a new template for similar content campaigns. You can also store task folders and projects all in one location for easy access and retrieval.
Examples of Marketing Templates:
Example of a Campaign Management Template:


4. Using Mass Editing
Mass editing is a tool in Wrike designed to save time. It allows you to edit several tasks at once without having to move through them one at a time.
For example, you can reschedule several tasks simultaneously by selecting each one and clicking the “Reschedule” button on the dropdown menu. After that, you would set up a new time and date for their completion without having to navigate to each task separately.
To Set Up Mass Editing:
- Navigate to a project or folder
- Click “List” view

- Click the “Mass Edit” icon on the panel above the list

- Click the checkmarks to the left of each task you want to edit

- Select a mass editing option from the dropdown menu on the right-hand side of the workspace.
The following chart shows the mass editing features available in Write’s free and paid accounts.

More Tips for Using Wrike
Use Wrike for any content campaign, no matter how large. You can even run multiple projects at the same time.
Collaborate seamlessly between your SMEs and your writing team. You can configure Wrike for multiple teams performing a myriad of tasks.
While it would be impossible to show all the features of Wrike in one post, there are a few more tips you can take with you.
For example, leverage Wrike’s unique permalink feature to crosslink work items. Also, switch to table view often to get a broader picture of all your projects.
Finally, get familiar with Wrike’s template creation tool. It will save you a lot of time, especially for recurring content campaigns.