How To Write a Family History Book—7 Steps Plus A Pro Tip
August 4, 2020
With the rise in popularity of media programming such as PBS’s Finding Your Roots, and the ease and accessibility of home ancestry and DNA test kits, more and more people are choosing to research their family history.
The internet has made this research easier than ever before.
For those who decide to go even further—to compile and record the facts and stories they find—it has also brought along tools for writing and publishing a family history book that can be shared and passed down for generations.
The idea of such a complex and time-intensive project can feel overwhelming. But with a little sticktoitiveness, and the right process, the journey can be a rewarding one.
Seven Steps to Writing Your Family History Book
Step #1: Getting the Family Involved:
One of the biggest challenges you will likely face will come at the very beginning of the process.
Hesitant family members or an older generation afraid of sharing family secrets can be a stumbling block, which often prevents people from going any further.
Carol Cooke Darrow, a Certified Genealogist in Denver Colorado, has personally written three separate family histories.
She also leads a monthly class teaching others how to do the same.
She suggests using photos as an ice-breaker. Direct questions may seem intrusive.
Showing someone a photo opens up the possibility for them to tell the story of who is in the picture, why they are there, what happened that day, and so on.
Step #2. Collecting Living Memories
Personally talk to or interview as many people as possible.
No amount of research can ever produce the rich detail of an actual remembered story.
While it is not always possible to interview someone in person, or even over the phone, letters and email can be extremely useful.
It is important to develop a set of written interview questions before you begin.
This will give your research a road map, and yet allow for the answers to go in an organic direction.
It will also give continuity to your narrative, as that begins to develop.
You can use this same set of questions whether conducting an interview in-person, by telephone, or even email.
Hollace Ava Weiner, of the Fort Worth Jewish Archives, suggests limiting the attendees at an interview.
She learned when writing her own family history that too many people in an interview can be a distraction, and lead to interruptions. “We wrote down questions. We assigned one person to ask the questions.”
You may even find it necessary to bring in a 3rd party to conduct the interviews.
People are sometimes more willing to share when other family members are not around.
Written transcripts, audio files, records, photos, and almost anything else can be attached to your final project.
If you plan to publish a traditional bound book, you will need to convert all of these to visual images that will become a page in the book.
If you envision something more like a scrap-book, you can attach these items directly to the finished product.
Family members who may be unwilling to give you an interview or share personal stories, may share photos, mementos, or other documents.
Assuring them that you will return originals, if they desire, will go a long way toward helping you in your cause.
Excellent quality prints and copies are now easy to get and steps can be taken to preserve the originals.
Step #3. Understanding and Choosing a Writing Format
There are many styles or formats to choose from when writing your family history book.
From the very technical formats used by historians to the more casual and eclectic scrapbook, you will need to decide what form your final project will take.
For historic archivists, the two most commonly used forms are the Register (sometimes called Descendancy) and the Ahnentafel.
The Register style essentially begins in the past and moves forward in time to the present.
The Ahnentafel begins in the present and moves backward, incorporating a specific numbering and charting system for tracking family units.
But unless you plan to submit your family history book to a national archive, you may want to take a more modern approach.
A memoir or family biography may be the right choice for you.
One method is to trace a surname back as far as you can, then write a chronological biographical narrative leading to the present day.
In this case you would place your ancestors within the context of history, writing their stories both remembered and presumed.
You will end up with something like a novel all about your family—the politics, economics, and circumstances that led to movement, migration, and settlement.
Another option is to compile records, stories, memories, interviews, charts, etc. scrapbook style in a bound book.
This approach is no less time consuming, but may be more suited for those wanting to combine multiple branches of the family tree into one book.
These also make lovely anniversary/engagement/graduation gifts.
Which style you choose depends on the narrative you wish to tell and the book you wish to produce.
Step #4. Conducting Family History Research
Some people have been conducting research for many years, and are just now thinking of compiling all of the information into a readable, preservable book.
Others have recently become interested in their family history and want to publish a book in time for a family reunion next year.
Wherever you are in your journey, and whatever your timeline, there are online tools available to help.
The internet makes research much quicker and easier than it ever has been in the past.
Access to microfiche, birth and death certificates, marriage licenses and divorce decrees, wills, census and military records, immigration and naturalization records, ship passenger lists, land records and even newspaper articles are all at your fingertips.
Free and paid sites such as these will be invaluable in your search.
- GED match
- International Society of Genetic Genealogy
- Mooseroots
- Cyndy’s List
- The National Archives
TWFH genealogist, Jennifer Rizzo, gives us her review of some of the best of these sites. She breaks them down by cost, pros, and cons in this great article.
Step #5. Document Collection
A good rule of thumb: If you cite it, you should include it.
Zoe von Ende Lappin, a member of WISE Family History Society in Denver, Colorado who has written and published a comprehensive family history entitled The Savages of County Louth and America, recommends that you “Identify unproven material, such as family stories, as such. But document those that you can verify.”
Think about the final product and how meaningful it will be if the records you were able to find were included in the bound book.
Many times you can request copies of documents through the site where you found them or download the records directly from the web.
Possible items to include are:
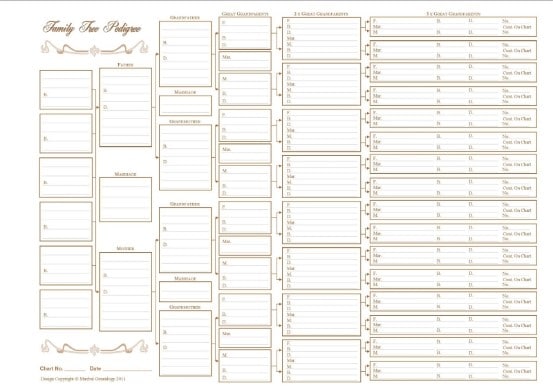
- The genealogy chart or family tree you create
- Maps showing movement and migration
- Census and military records
- Photographs
- Letters
- Marriage licenses
- Divorce decrees
- Land deeds
- Wills
- Newspaper clippings
- Written, audio, or video transcripts of family interviews
- Images of family heirlooms, such as a watch or wedding rings
Step #6. Writing Your Story
Now it is time to start writing.
There are many online tools for writing, charting, and organizing everything that you have collected.
Back Up My Tree, Evernote, and WordPress are all excellent! But a simple word-processing software such as Word or Pages is also sufficient.
The most important thing is that you put it down in writing.
It is also important to think about your audience.
Who is going to read this?
If writing a memoir, write in first person, otherwise a third-person narrative is the best approach.
Story-telling is the way history has always been passed down.
As you are collecting stories, you may discover a recurring theme.
You might notice that a large number of your ancestors followed a similar profession.
You may see that most of them were members of the same societies or fraternal organizations.
Following a theme is a good way to give your research direction, and begin to formulate a narrative.
Consider your audience as you begin to define the project.
No one wants to read every detail of every descendant you have ever had leading back to The Garden.
Choosing a specific theme that interests you, or one specific couple whose lineage you want to follow, will give you the framework for a story people want to read, and that you want to write.
One commonly used theme is to write about the members of a family who lived in one specific geographic location. The Smiths of Texas County, is an example.
Or you may choose something more unusual such as a family history of recipes.
Much can be learned about a family through the food they eat.
You could write stories about the women, where they lived, how they found local ingredients, the economic challenges they faced, and the children they bore.
Carol Cooke Darrow suggests that “starting small, choosing something you want to preserve, and giving yourself a deadline” are all keys finishing the project.
Step #7. Publishing Your Story
You got the family involved, you collected the living memories, you chose a format, you conducted extensive research, collected all the documents, and wrote your story.
Now it is time to publish your hard work.
For many projects, Amazon’s CreateSpace is a high quality, low cost option.
With online tools accessible 24 hours a day, 7 days a week, and no up-front fees, they are an easy safe zone in the self-publishing market.
There are limitations with what you can do creatively. But, if you are looking for straight-forward templates and quick publishing turn-around, CreateSpace has everything you need.
For a more robust project, or one where you have more creative control, you may need to look to a smaller publishing house.
Stellar Communications, for example, has a team of professional editors, writers, graphic artists, photographers, illustrators, and more who can help you with your custom job.
Other self-publishing sites such as Lulu, Otter Bay, Geology House, Stories to Tell Books, and Legacy Books are all online and offer different features.
Pro Tip- Including Photos and Visuals

A picture is worth a thousand words, and at no time is that more true than in a family history.
If you have been able to collect photos and other visual history, you will no doubt want to include those in your final book.
Make yourself aware of any copyright laws regarding your materials, and always remember to give credit where credit is due by documenting where you found the image.
After scanning the originals, Dropbox, cloud storage, and even thumb drives can be helpful as images can take up significant amounts of space on your hard drive.
For storing original photos and other delicate items, our expert Jennifer Rizzo recommends a good-old fashioned cedar chest.
Just make sure to place them in a polyester sleeve or acid free paper box first, and store the chest away from direct heat or moisture.
Writing down your family history is a gift to yourself, your relatives, and to generations yet to come.
Whether for an anniversary gift, a submission to a national historic archive, or simply a compilation of many years’ worth of personal research, it is a project worth perusing.
Recognizing the scope of the project, setting an achievable deadline, and following these steps will help you achieve the goal of a beautiful, polished, and sharable finished product.