Commonly Used Printing and Publishing Terms

To a first-time author, few stages of the book-writing process are as overwhelming as publishing and printing.

You’ll make decisions about everything from cover art to paper quality. You’ll have to decide which printing option is right for you and your readers. You’ll need to have opinions about whether you want a prologue or an appendix — or both.

You’ll also have to learn some industry jargon along the way. Need a starting point? Check out this list of commonly used printing and publishing terms:

  1. Appendix

    A section at the back of a book that contains relevant “extra” materials that don’t really fit anywhere else. Items that might go in an appendix include things like copies of original documents, letters, maps, family trees, graphics, or lists of recommended reading.

  2. Binding

    This refers to how the pages and cover are put together. A few common types of binding include:

    • Perfect Binding
      Also known as a “soft cover book,” a perfect bound book features a durable (but flexible) cover and is held together with a heavy-duty adhesive. Most mass market paperbacks (the paperbacks you find in bookstores or grocery stores) feature perfect binding.

    • *Most paperback books are perfect

    • Saddle Stitching
      This is a slightly misleading name because there’s no actual stitching involved. Instead, pages and cover are folded and stapled along the crease. Magazines, booklets, and short manuals often feature saddle stitching. Saddle stitching is very inexpensive.


    • Hardcover
      As the name suggests, these books feature hard, sturdy covers made of cardboard, fabric, or even leather and are often wrapped in a protective dust jacket. Hardcover books tend to be pricier to print than other types of binding.


    • Spiral Binding
      An inexpensive option that features a plastic or wire coil. Because spiral-bound pages can lay perfectly flat, this is a great choice for more “interactive” publications like workbooks or guidebooks.


  3. Draft

    A draft is a working (as in, not final) version of a book. In most cases, a draft is a Word document. Drafts go through multiple rounds of editing and revisions before they become final.

  4. Dust Jacket

    The removable paper cover that protects a hardcover book. Most dust jackets have a cover illustration, a book synopsis on the front inside flap, and an “About the Author/About the Company” blurb on the back inside flap (In case you were wondering, you don’t have to have a dust jacket. There are other options, such as casewrap, that look just as nice. They’re often more affordable, too.).

  5. EBook

    Short for “electronic book.” eBooks are an increasingly popular alternative to traditional publishing. eBooks look exactly like traditional books, but they are designed to be read on tablets or dedicated eReaders (like the Amazon Kindle or the Barnes & Noble Nook). Many self-published authors prefer eBooks because they are much less expensive to produce than traditional paper books.

  6. Editing

    Unlike proofreading, which focuses on small grammar and spelling errors, editing is all about the big picture. Editing typically includes things like rewriting sentences for clarity, deleting unnecessary paragraphs, rearranging sections of a chapter, or adding details to make your writing more interesting. You can edit your draft yourself, or hire an editor to help you improve your writing.

  7. Foreword

    A short introduction that appears at the beginning of the book. A foreword can be written by the book’s author, but it’s often written by someone else, such as an industry expert or a respected author.

  8. Galley

    This is a sample copy of the book once it’s been through the layout and design stages. The galley copy provides a final opportunity to review or make changes before the book goes to print.

  9. Matte Vs. Glossy

    You’ll most likely have to decide between these two options when you choose a book cover or dust jacket. A glossy finish is super-shiny and a tiny bit reflective. A matte finish is low-shine and typically non-reflective.

  10. JPEG

    Pronounced “jay-peg,” a JPEG is a common format for compressing digital photos. If you plan to include photos in your book, you’ll likely need to convert them to JPEG format. Working with older photos? No worries. You can use a scanner to convert them to digital.

  11. ISBN

    Short for the International Standard Book Number, the ISBN is the unique number and accompanying bar code assigned to all commercially published books. A book’s ISBN contains a variety of information, including the country where the book was published, the publisher, edition, and more. The ISBN is also used by bookstores and libraries.
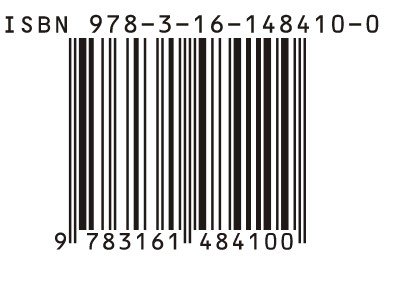

    *Traditional publishers (and most reputable self-publishers) assign an ISBN to all books they produce.

  12. PDF

    A PDF is another common digital file format. Unlike a bare-bones Word document, a PDF looks exactly like a printed page and will include design elements, graphics, custom fonts, and more.

  13. Print On Demand

    A type of publishing option where books are printed individually when they are ordered. This is an economical alternative to traditional publishing, which typically requires you to print a few hundred books at once.

  14. Prologue

    An introductory section that appears before the main book. In a non-fiction book, you can use a prologue to provide context or background information, or to explain your relationship to the subject matter. In a fiction book, a prologue might be a short vignette that sets the scene for the main story. A prologue is written by the book’s author.

  15. Proof

    In publishing lingo, “proof” means a pre-print sample of a book. Typically, your publisher or printer will provide you with a proof to review before your book is printed. This is your last opportunity to do a thorough review and catch any typos or formatting issues before your book goes to print.

  16. Proofreading

    Proofreading means going through a final draft to correct small issues such as missing punctuation, typos, or grammar and spelling errors.

  17. Publisher Vs. Printer

    What’s the difference? In most cases, a publisher handles all aspects of your book, from layout and design to printing, sales, and distribution. (Depending on what kind of publisher you’re using, a publisher may handle marketing and publicity, too.) A printer does exactly what the name suggests: They print your book. Printers don’t normally offer additional services like graphics, design or marketing.

  18. Self-Publishing

    Self-publishing is an increasingly popular option, and with good reason: It’s easy, it’s faster than traditional publishing, and it’s a great choice if you’re writing for a smaller audience and/or you want to retain complete creative control over your book. What’s more, many of the leading self-publishing companies produce beautiful books that rival their traditionally published counterparts. Our pick for self-publishing? CreateSpace, which is owned by Amazon.com.

  19. Table of Contents

    A table of contents appears at the front of the book and lists each chapter or section.

The Harvey Memory Project

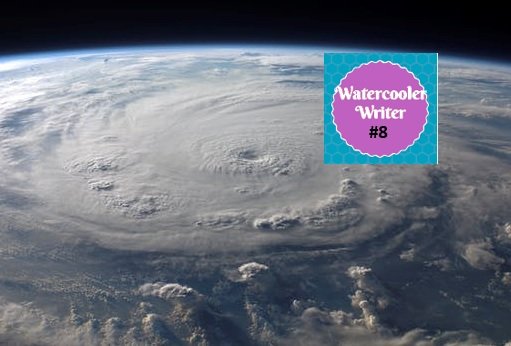
It’s hard to believe that it has already been more than a year since Hurricane Harvey dropped more than 30 trillion gallons of water along the Texas Gulf Coast, causing immeasurable amounts of destruction and devastation.

To those who experienced the disaster firsthand, memories of those days (and the months of recovery after) are burned forever in their minds.

In an effort to preserve, protect, and archive those memories, Rice University, Houston Public Library, Harris County Public Library, and the University of Houston Libraries have teamed up to form the Harvey Memory Project.

The project, which is funded by the Rice Houston Engagement and Recovery Effort and by the Rice Humanities Research Center’s Public Humanities Initiative, aims to collect various stories, pictures, and audio-visual recordings from people who survived the epic hurricane.

The contributions that are collected will be held in a memorial repository, which will be available for use by both the general public and by researchers and students studying the history of Hurricane Harvey.

For more information, to make a contribution, or to browse stories and pictures that have already been submitted, just click here: Harvey Memory Project.


The Short Story ATM

Gone are the days when it was common for Americans to sit around and read for pleasure.

Whether it can be attributed to our busier lifestyles or our lack of attention spans, it is estimated that Americans only read for pleasure an average of 17 minutes each day.

In fact, the percentage of Americans who read for pleasure on any given day continues to decline, bringing us to an all-time low.

In an effort to improve these statistics and to promote literacy, public libraries throughout the country (and the world) are coming to the rescue with ATM-like machines that dispense short stories.

According to this great story from CBS News,  with just the press of a button, users can receive a free short story that takes either one, three, or five minutes to read. The stories, which vary in genre and style, are printed on environmentally friendly paper, using biodegradable ink.

And although there are currently only 35 short-story dispensers in North America, and 180 worldwide, those numbers are starting to grow.

This is great news for writers, too!


MICROSOFT WORD TIPS FOR WRITERS … *Mac Edition*

A little while back, we compiled some “Word hacks” that our writers have learned over the years of working with Microsoft Word. But we realized that Microsoft Word is, like all things, different across platforms. So not to be left out, our Mac users piped up with tips and tricks of their own.

Take Control from A to Z


PC users know that ctrl functions can really speed along their word processing. Mac users have a different – but equally useful – key in the COMMAND key (denoted with a snazzy ⌘ icon). And what do you know? Every letter in the alphabet (plus ⌘) has its very own function.

  1. A

    will highlight all the text in the entire document.

  2. B

    bolds your highlighted text.

  3. C

    copies to the clipboard anything you’ve highlighted.

  4. D

    opens the font window so you can adjust your typeface.

  5. ⌘F

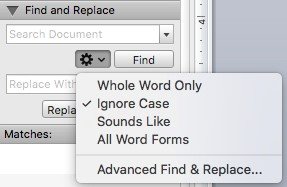
    pushes the cursor up to the top-right search bar – from there, you can perform other find and replace functions by clicking on the gear drop-down menu:

  6. ⌘G

    goes to the next instance of the word you’re finding in the Find & Replace function.

  7. ⌘H

    hides the entire Word program (don’t worry, it hasn’t gone away – just click on Word in your dock to bring it back to the forefront). For those of you who operate a cluttered desktop and need some quick breathing room, OPTION ⌘H hides everything else so you can just see your open Word docs.

  8. ⌘I

    turns highlighted text into italics.

  9. ⌘K

    adds a hyperlink to highlighted text.

  10. ⌘M

    minimizes the Word window into the dock.

  11. ⌘N

    creates a new blank Word document.

  12. ⌘O

    opens a dialogue box that prompts you to open a different document.

  13. ⌘P

    opens your print dialogue box.

  14. ⌘Q

    quits the Word application (it will prompt you to save before taking that action, so you don’t need to worry about losing your work).

  15. ⌘S

    saves your document.
    (Important note: This quick-save option saves your work as the current version only! SHIFT-⌘S lets you do a Save As rather than save-and-replace, in case you don’t want to save over your previous draft.)

  16. ⌘T

    inserts a tab (the position/distance is set in Format > Tabs).

  17. ⌘U

    underlines your highlighted text.
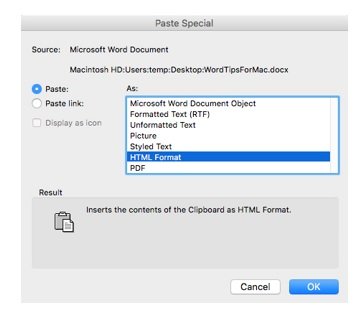
    Alternatively, CONTROL ⌘V opens the Paste Special dialogue box to choose the formatting for your pasted copy.
  18. ⌘V

    opens the Paste Special dialogue box to choose the formatting for your pasted copy.
  19. ⌘W

    closes your current document (it will prompt you to save before taking that action).

  20. ⌘X

    deletes a highlighted word.

  21. ⌘Y

    will redo your last action.

  22. ⌘Z

    will undo your last action.

We’ve reached the end of the alphabet but definitely not the end of our keystrokes for fast action.

What's Your Preference?

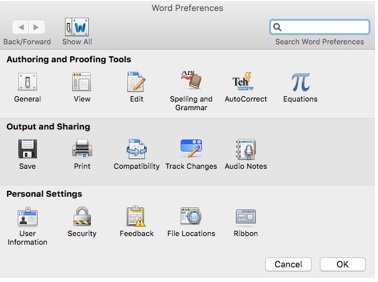
, opens your Word preferences window.

Use Proper Grammar

OPTION ⌘ L brings up a Spelling & Grammar toolbox. From here, click Options to select a variety of editorial aids to help you write your copy. This enables a ton of handy checks and balances. Our writers find the final check box option “Show readability statistics” particularly handy. This gives a measurement of how your content will match your audience’s reading level.

Capture Those Screenshots

One of our favorite quick key options is for grabbing screenshots. We find that visuals help explain many situations: A picture is definitely worth a thousand words! So our writers have discovered shortcuts to creating screenshots. There are several ways to do this.

 SHIFT 3 simply takes a screenshot of your entire desktop.

SHIFT 4 gives you a bulls-eye to click and drag over just your desired image. Hold down your mouse while you capture the image you want, then release the mouse to snap the photo. Or hit ESC to release the bulls-eye and start over.

SHIFT 4, then spacebar, pulls up a camera icon. Hover the camera over the specific app window you want to capture, then click the mouse for an image of the visible part of that window.

Watch Your (Foreign) Language

Whether or not you are fluent in multiple languages, you can— and should—still perform a spell check for everything you write. Word enables you to choose alternate dictionaries to accomplish this. You just need to let the app know which text should be checked in which language.

OK, so this isn’t a ctrl function or a quick key shortcut, but we found this feature an important one to include. It’s covered in the original “Word hacks” post, but here’s how Mac accomplishes it.

  1. Highlight the foreign text.
  2. Under the Tools menu, click Language.
  3. In the pop-up list, click the language that you want, and then hit OK.
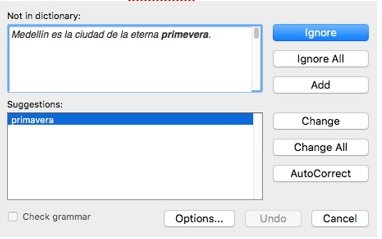
  4. Mark the text, then check the spelling in your document (Under Tools, click Spelling and Grammar, or use the quick keys we just mentioned: OPTION L). When the spelling checker encounters the marked text, it uses the specified language dictionary to check the text:

Medellín es la ciudad de la eterna primevera.

[Word has flagged “primevera” as misspelled and provided a correction.]

Protecting Your Formatting

Computerworld recently shared a tip for pasting content into a Word document without messing up your formatting. It calls making a couple of adjustments to your System Preferences.

To do this, open System Preferences on your Mac and then:

  1. Select Keyboard
  2. Select Shortcuts Pane
  3. Select App Shortcuts, and then All Applications
  4. Tap the Plus button
  5. Type “Paste and Match Formatting” in the first box
  6. In the second box, press Command V. Now when you paste something with a Command V shortcut, it will default to the formatting of your destination document.

Graduation Speeches in 50 Words Or Less?

Graduation is an exciting time.

Whether you are the one getting the diploma, or you are supporting a loved one from the audience, graduation is a celebration of years of hard word and a future full of opportunities.

But, let’s be honest. Sitting through long graduation speeches can, at times, be excruciating.

What if there was a limit put on the length of those graduation speeches, though?

And what if that limit were only 50 words?!?

Well, last year the New York Times asked their readers to submit graduation speeches with the stipulation that they had to be no more than 50 words.

The result was a great collection of short and sweet “words of wisdom,” which the NYT published in this fun article.


How to Make Your Website 60% More Effective

  1. It’s no secret that shorter paragraphs on web pages makes for easier reading.

    But, did you know that shorter webpages are nearly 60% more usable?

    Additionally, tweaking your copy and re-writing it to be more concise, scannable, and objective can increase the usability to 124%!

    According to this interesting article from Wylie Communications, by simply cutting down on the amount of words you use and getting rid of some of the unnecessary clutter, your readers actually retain more information and are far more likely to read through your entire webpage.

    The article also gives some great pointers on how to make your webpage more Web and Mobile friendly.